
Foil art brings an exciting twist to your crafting adventures, infusing projects with a unique shine and dimension without breaking the bank. Perfect for enthusiasts of all ages, these 12 creative ideas showcase the versatility of aluminum foil and craft foils, transforming ordinary materials into stunning works of art. Whether you’re looking to brighten up a room or create memorable gifts, there’s something here for everyone, ready to inspire your next artistic endeavor.
Textured Aluminum Foil Relief Art
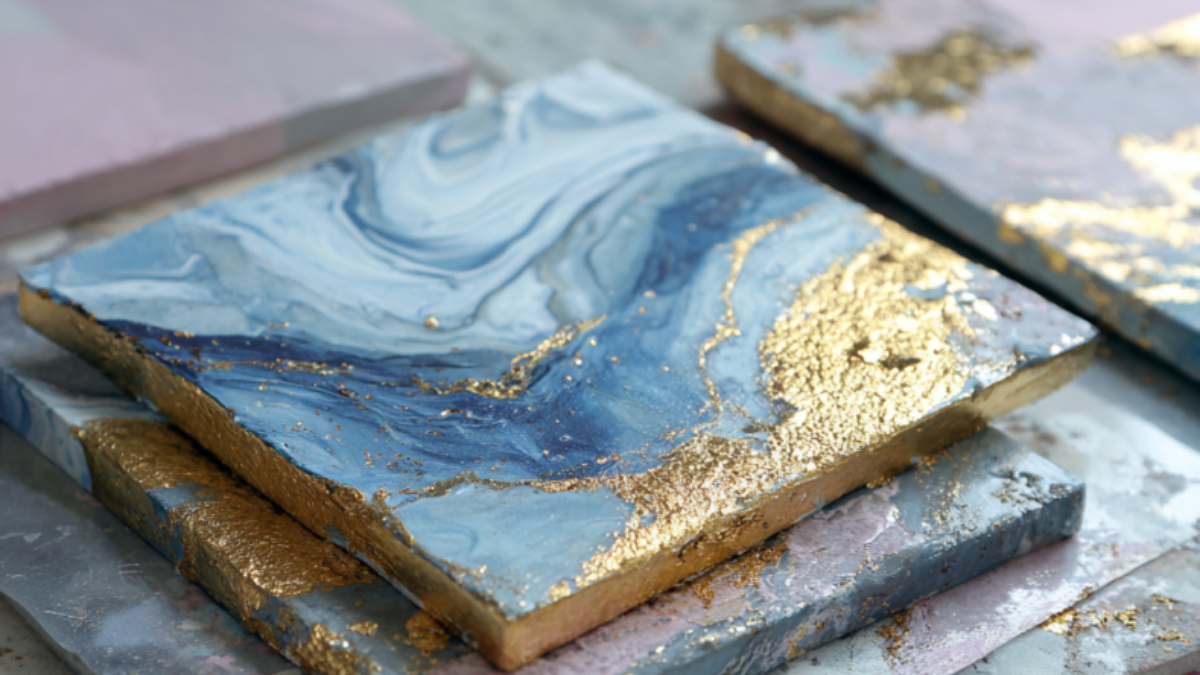
Textured aluminum foil relief art is a fantastic way to create stunning visual effects using simple materials. The image showcases a beautiful example of this technique, featuring intricate patterns and shiny surfaces that catch the light in captivating ways.
To start, gather your supplies: aluminum foil, glue, and a sturdy backing like cardboard or canvas. Begin by applying glue in your desired pattern on the backing. Once the glue is set, carefully lay the aluminum foil over the design, pressing it down gently to create texture. The result is a dynamic piece of art that plays with light and shadow.
This project is perfect for all ages. Kids will love the tactile experience of molding the foil, while adults can explore more complex designs. You can even add color by painting over the foil or using colored foil sheets for a vibrant twist. Display your finished piece on a wall or gift it to someone special!
Gold Foil Lettering on Canvas
Gold foil lettering on canvas is a stunning way to add a touch of elegance to your home decor. This project is perfect for all ages and skill levels, making it a fun activity for families or a relaxing solo craft. The shiny gold foil creates a beautiful contrast against the canvas, making your words pop and shine.
To start, gather your materials: a blank canvas, adhesive foil or heat-transfer foil, and a design or quote you love. You can sketch your lettering lightly with a pencil or use stencils for a more polished look. Once you have your design in place, apply the foil according to the instructions on your adhesive. The result is a chic piece of art that not only looks great but also adds a personal touch to your space.
This technique is versatile. You can create motivational quotes for your workspace, personalized gifts for friends, or even decorative pieces for special occasions. The gold foil adds a modern twist to traditional lettering, making it a trendy choice for any room.
Foil Scratch Art for Kids
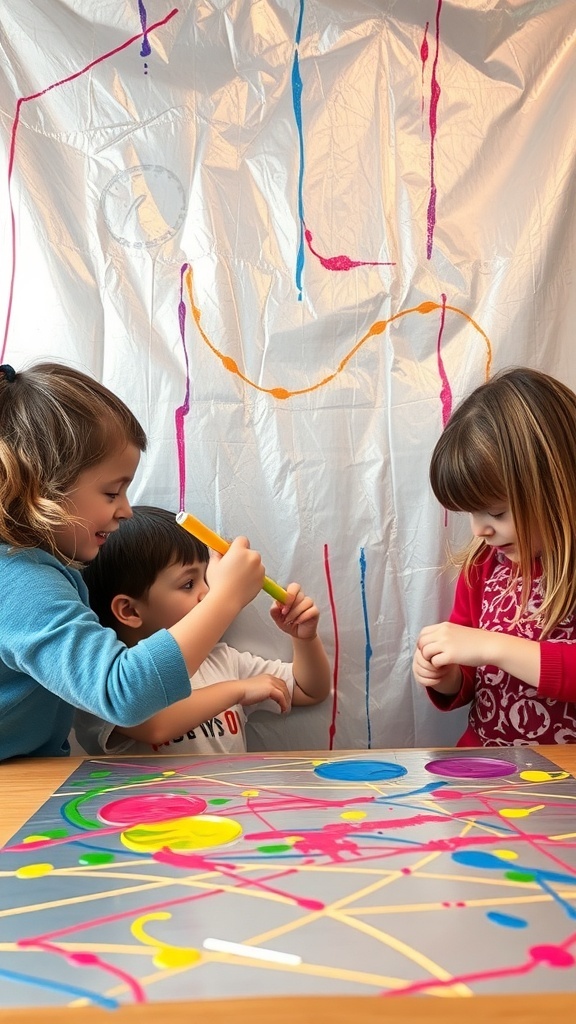
Foil scratch art is a fun and engaging way for kids to explore their creativity. In this project, children can use colorful paints to cover a sheet of foil, creating a vibrant canvas. Once the paint dries, they can scratch away parts of the paint to reveal the shiny foil underneath, creating beautiful metallic designs.
In the image, we see three kids gathered around a table, excitedly working on their scratch art. One child holds a bright yellow tool, ready to scratch away the paint. The other two kids are focused on their own creations, showcasing the collaborative spirit of this craft. The colorful backdrop adds to the playful atmosphere, making it a perfect setting for artistic exploration.
This project is not only easy to set up but also allows for endless creativity. Kids can experiment with different colors and patterns, making each piece unique. Plus, it’s a great way to develop fine motor skills as they scratch away the paint. Gather some foil, paint, and tools, and let the fun begin!
Foil Stained Glass Sun Catchers
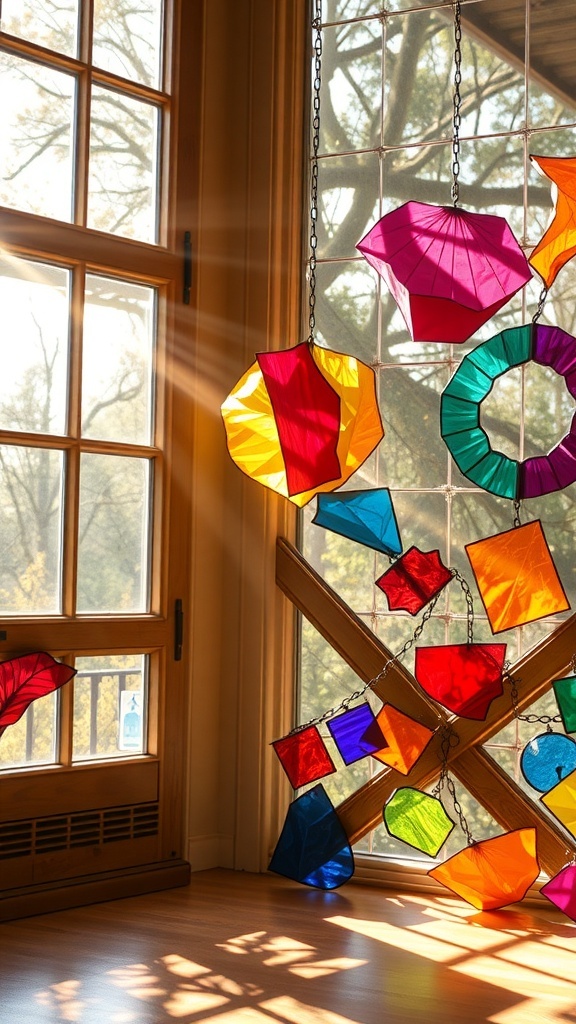
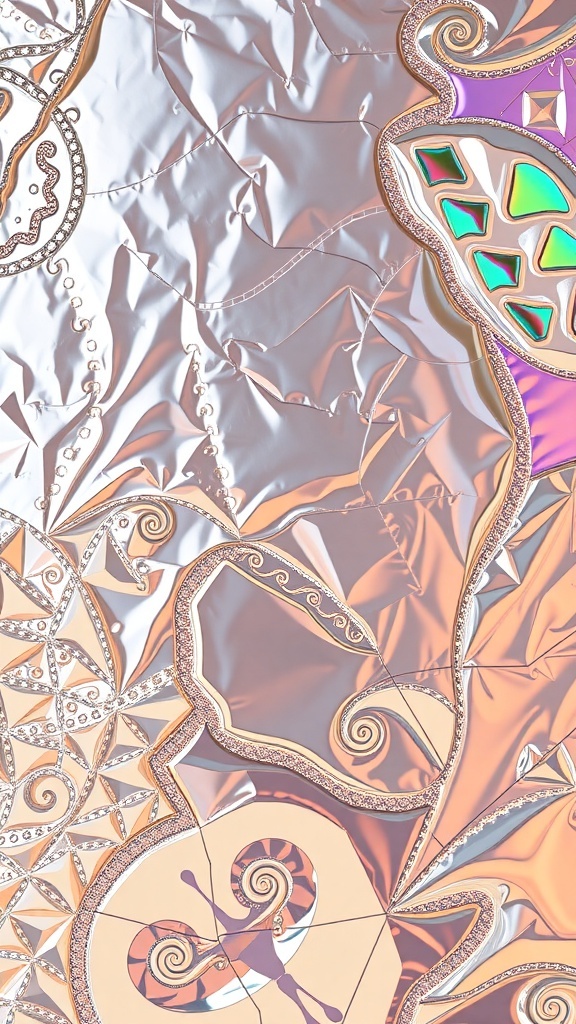
Foil stained glass sun catchers are a delightful way to bring color and light into your home. These eye-catching pieces mimic the beauty of traditional stained glass but are much simpler to create. Using colored tissue paper and aluminum foil, you can craft stunning designs that dance with sunlight.
Start by cutting your tissue paper into various shapes. Think of leaves, flowers, or abstract forms. Next, lay them on a piece of clear plastic or a sturdy piece of cardboard. Cover the shapes with aluminum foil, gently pressing it down to create a smooth surface. Once everything is in place, you can hang your creation in a window. When the sun shines through, the colors will come alive, casting beautiful reflections around the room.
This project is perfect for all ages. Kids will love the hands-on aspect, while adults can enjoy the artistic expression. Plus, it’s a great way to recycle materials you might already have at home. So gather your supplies and let your creativity shine!
Foil-Wrapped Sculptures
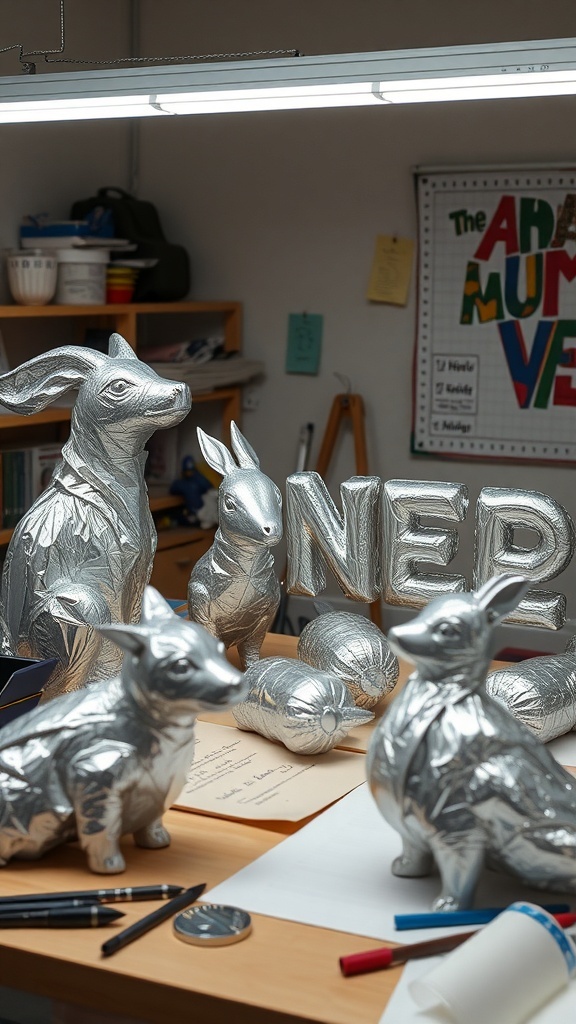
Foil-wrapped sculptures are a fun and engaging way to spark creativity in both kids and adults. Using aluminum foil, you can shape anything from animals to letters, making it a versatile project for all ages. The shiny surface of the foil adds a unique touch, transforming simple forms into eye-catching art pieces.
In the image, you can see a delightful collection of foil-wrapped animals and a shiny word sculpture. Each piece showcases the playful nature of this craft. The details in the animals, like the ears and tails, highlight how easy it is to create lifelike shapes with just a few folds and twists of foil. The word sculpture adds a modern element, perfect for personalizing your space.
To get started, all you need is aluminum foil and a bit of imagination. Begin by crumpling and shaping the foil into your desired form. You can layer pieces for added depth and detail. Once you’re happy with your creation, display it proudly on a shelf or desk. This project is not only enjoyable but also a fantastic way to encourage artistic expression.
Foil Collage Wall Art

Foil collage wall art is a fun and vibrant way to bring life to any space. The image showcases a colorful array of crinkled foil sheets in various shades, creating a dynamic visual experience. Each piece of foil reflects light differently, adding depth and interest to the overall composition.
To create your own foil collage, start by gathering a variety of colored foil sheets. You can find these at craft stores or online. Cut them into different shapes and sizes, allowing your creativity to flow. Think triangles, squares, or even abstract forms. The key is to layer them in a way that feels balanced yet spontaneous.
Once you have your shapes, use a glue stick or craft glue to adhere them to a canvas or sturdy paper. Don’t be afraid to overlap the pieces; this adds texture and dimension. The shiny surfaces will catch the light, making your artwork pop. Hang your finished piece in a well-lit area to truly showcase the beauty of the foil.
This project is perfect for all ages. Kids will love the tactile experience of crumpling and arranging the foil, while adults can appreciate the modern aesthetic it brings to home decor. Plus, it’s a great way to recycle leftover foil from other projects!
DIY Metallic Foil Bookmarks
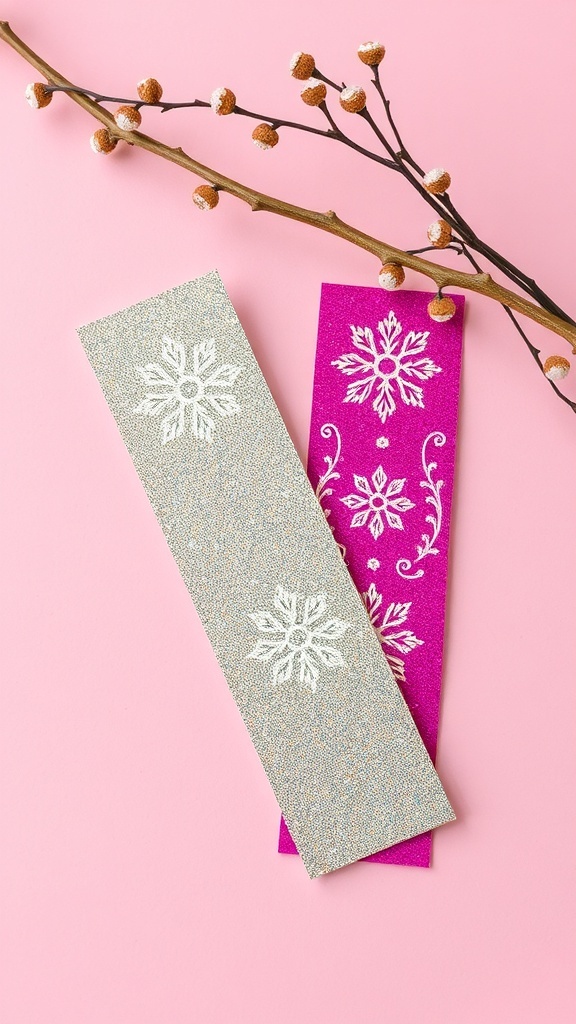
Creating your own metallic foil bookmarks is a fun and simple project that anyone can enjoy. The image shows two beautifully designed bookmarks, one in a shimmering silver and the other in a vibrant pink. Each bookmark features intricate snowflake patterns that catch the light, making them not just functional but also visually appealing.
These bookmarks are perfect for adding a touch of elegance to your reading experience. They can also make thoughtful gifts for friends and family who love to read. The combination of foil and color gives them a modern twist, making them stand out on any bookshelf.
To make these bookmarks, you’ll need some basic supplies: metallic foil sheets, adhesive, and a pair of scissors. Start by cutting the foil sheets into your desired bookmark size. Then, apply adhesive to the surface and carefully lay the foil on top, smoothing it out to avoid any bubbles. Once dry, you can add designs using a craft knife or stamps to create unique patterns.
These DIY metallic foil bookmarks are not only easy to make but also allow for endless customization. You can experiment with different colors, shapes, and designs to match your personal style. Whether you’re a bookworm or just looking for a creative outlet, this project is sure to inspire your artistic side!
Embossed Foil Holiday Ornaments

Creating embossed foil holiday ornaments is a delightful way to add a personal touch to your festive decorations. These ornaments shine with metallic elegance, making your tree look stunning. You can easily make them at home with just a few materials.
Start with some lightweight cardboard or cardstock as your base. Cut out shapes like snowflakes, stars, or traditional ornaments. Next, use a glue gun to apply a thin layer of glue to the surface. Carefully lay down your foil sheet over the glue, pressing gently to ensure it sticks well.
Once the glue dries, you can add details by embossing patterns with a stylus or the back of a spoon. This step creates beautiful textures that catch the light. Afterward, trim any excess foil and punch a hole at the top for hanging. Add a ribbon or string, and your ornament is ready to adorn your tree!
These embossed foil ornaments not only look great but also make wonderful gifts. Kids can join in on the fun, making this a perfect family project. Hang them on your tree, or use them as unique decorations around your home.
Foil Print Greeting Cards

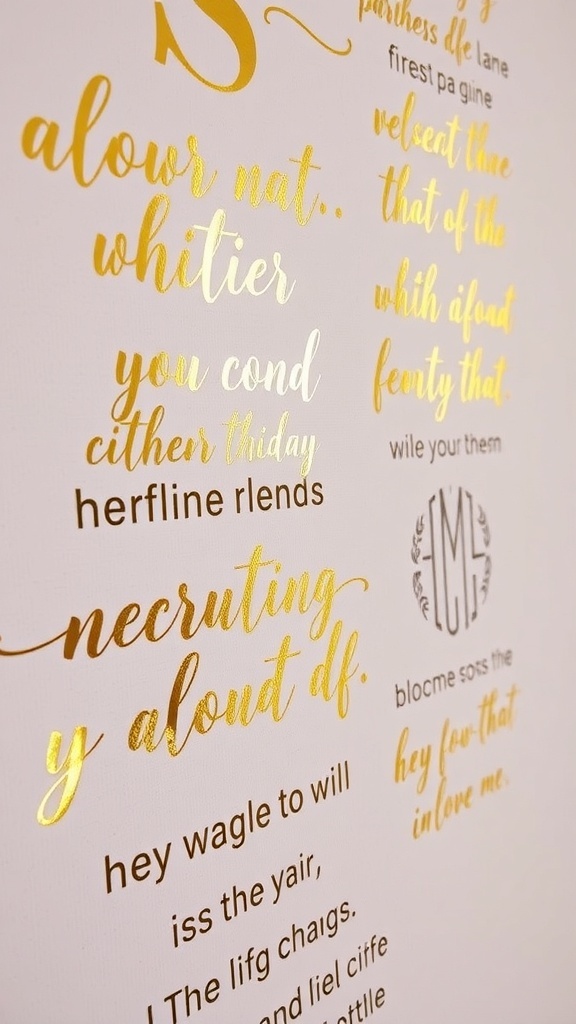
Foil print greeting cards are a delightful way to express your creativity while adding a touch of elegance to your messages. The image showcases a collection of cards featuring various phrases in shimmering foil. Each card has a unique design, with some featuring gold lettering and others in soft blue tones. This variety makes them perfect for any occasion, whether it’s a birthday, thank you note, or just a friendly hello.
Creating these cards is simple and fun. Start with blank cards made from sturdy paper. Choose your favorite phrases or quotes to print. You can use adhesive foil or heat-transfer foil to apply the metallic accents. The result is a stunning card that stands out and adds a personal touch to your sentiments.
These cards are not just for personal use; they also make fantastic gifts. Imagine giving a set of beautifully crafted cards to a friend or family member. They’ll appreciate the thoughtfulness and the chance to share your artistic flair with others. Plus, making them together can be a fun activity for kids and adults alike!
Nature-Inspired Foil Leaf or Feather Prints
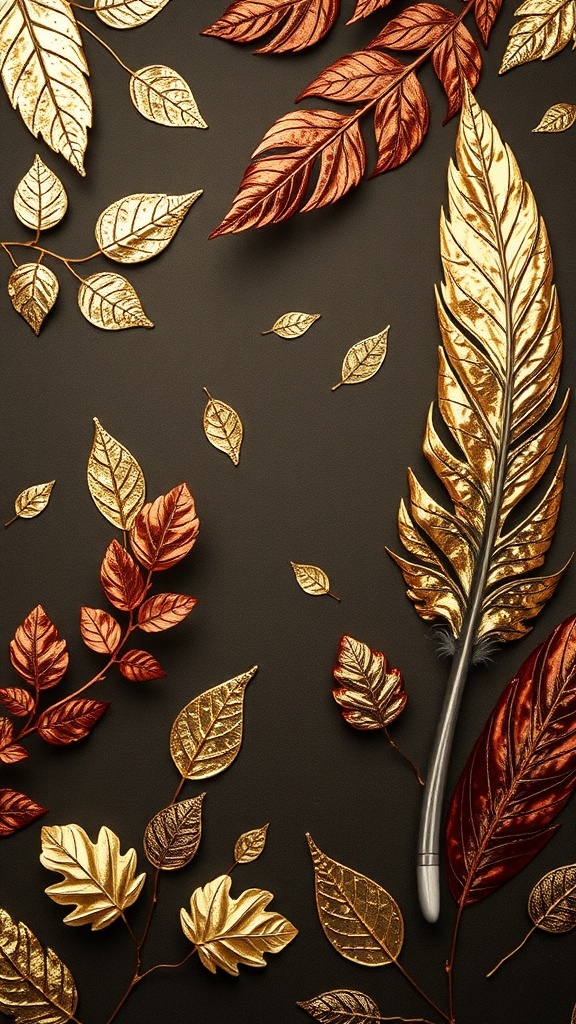
Nature-inspired foil leaf or feather prints are a stunning way to bring the beauty of the outdoors into your home. This project is perfect for all ages and offers a unique blend of creativity and nature. Imagine creating beautiful, shimmering prints that capture the essence of leaves and feathers, all while using simple materials.
To start, gather some real leaves or feathers. Choose a variety of shapes and sizes for added interest. Once you have your natural elements, you’ll need some adhesive, foil sheets, and a burnishing tool or your fingers to press the foil onto the prints.
Begin by applying a thin layer of adhesive to the surface of the leaves or feathers. Carefully place the foil over the adhesive, shiny side up. Gently press down, ensuring the foil adheres well to the surface. Once you’ve covered the entire area, slowly peel away the foil to reveal a stunning metallic outline of your natural elements.
This technique creates a beautiful contrast between the organic shapes and the shiny foil, making each piece a unique work of art. You can frame these prints or use them as decorative accents in your home. They make excellent gifts too, showcasing a personal touch that friends and family will appreciate.
Foil Mosaic Art
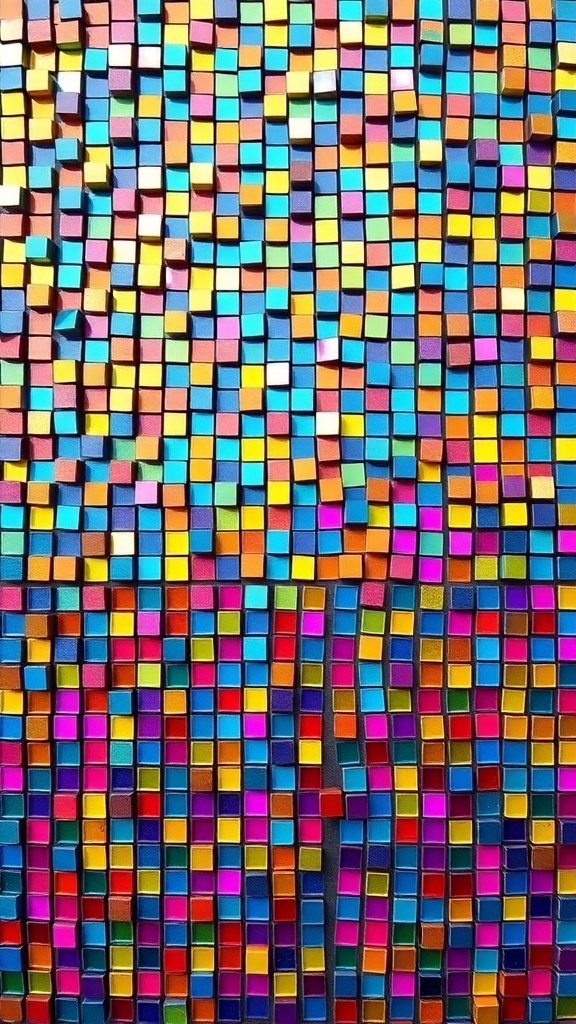
Foil mosaic art is a fun and engaging way to create stunning visuals using simple materials. This project allows you to play with colors and shapes, making it perfect for all ages. The image showcases a vibrant arrangement of small squares in various shades, creating a lively and dynamic pattern. Each piece reflects light differently, adding depth and interest to the overall design.
To start your foil mosaic, gather some colored foil sheets or aluminum foil. Cut them into small squares or rectangles. You can use scissors or even tear them for a more organic look. Next, prepare a sturdy base like cardboard or a canvas. Apply glue in sections and begin placing your foil pieces, allowing your creativity to flow. You can create abstract designs or even recognizable shapes.
This project is not only enjoyable but also a great way to enhance fine motor skills, especially for kids. The shiny foil adds a modern touch to your decor, making it a fantastic addition to any room. Once completed, consider framing your artwork or using it as a unique wall hanging. Foil mosaic art is a delightful way to express creativity and brighten up your space!
Foil-Enhanced Photo Frames
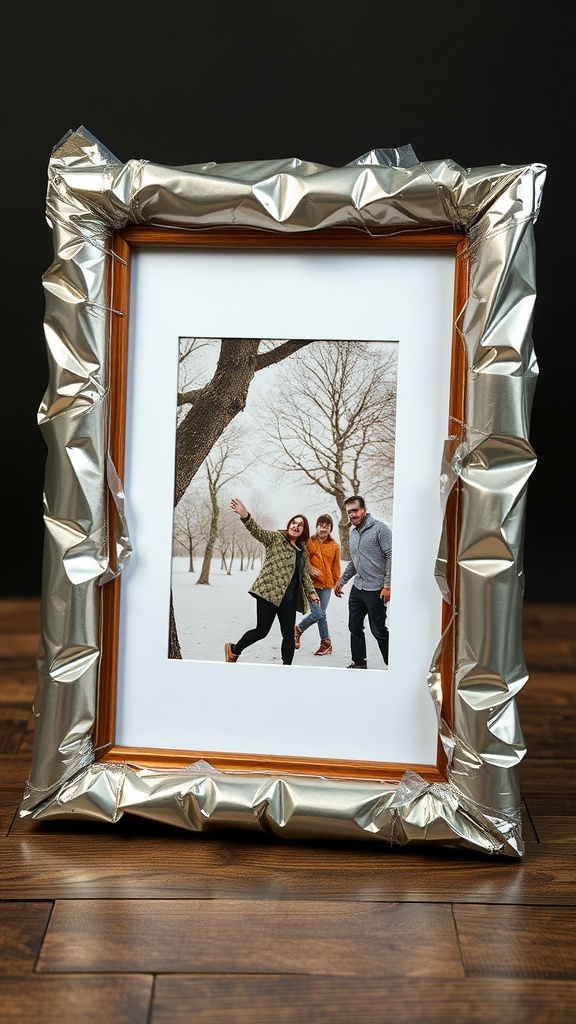
Foil-enhanced photo frames are a fun and stylish way to showcase your favorite memories. This project is perfect for all ages and can easily be customized to fit any decor style. The image shows a photo frame wrapped in shiny aluminum foil, creating a modern and eye-catching look.
To create your own foil-enhanced frame, start by selecting a simple wooden or plastic frame. Next, cut a piece of aluminum foil large enough to cover the entire frame. Gently wrap the foil around the frame, making sure to smooth out any wrinkles for a polished finish. You can secure the foil with glue or tape on the back side.
For a more textured look, crumple the foil slightly before wrapping it around the frame. This adds dimension and catches the light beautifully. Once your frame is ready, insert a favorite photo and display it on a shelf or wall. It’s a simple project that adds a touch of shine to any space!
Add a Comment